Objective
Create tracked items manually, manage item columns and bulk actions, import inventory files, and export item data.
Prerequisites
- You are signed in as an owner or manager.
- At least one location and one unit exist.
- Owners can use Inventory Import.
Step-by-step Instructions
Open Items and find an item
Navigate to Manage > Items. Use Filter items to search. Click Columns, check the fields you want visible, and click Apply.
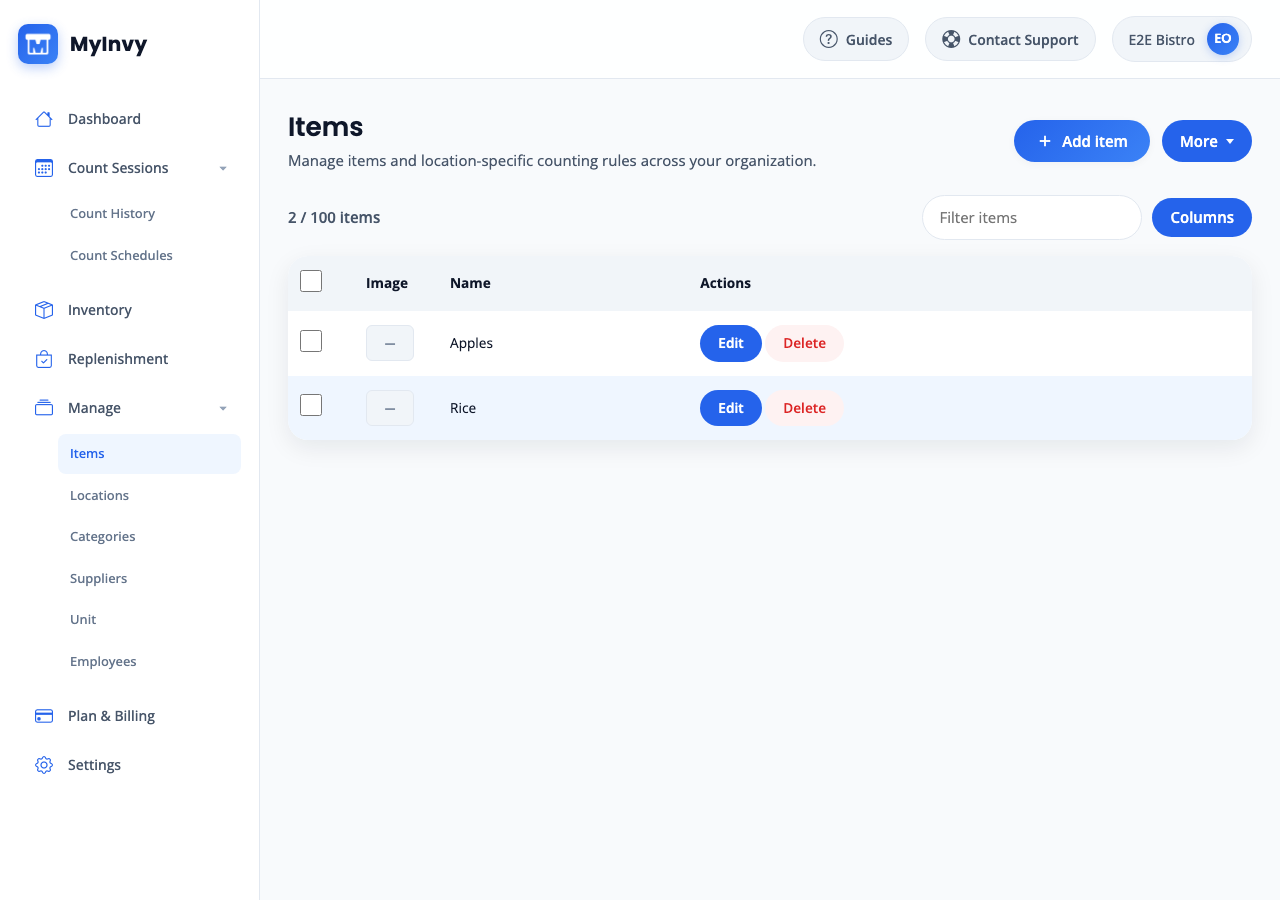
Items page with Add item, More, Filter items, Columns, and selectable table rows. Use the More menu
Click More to choose Import inventory, Export, Quick Edit or Done, and Show Locations or Hide Locations. Use Export when you need a copy of the current item data.
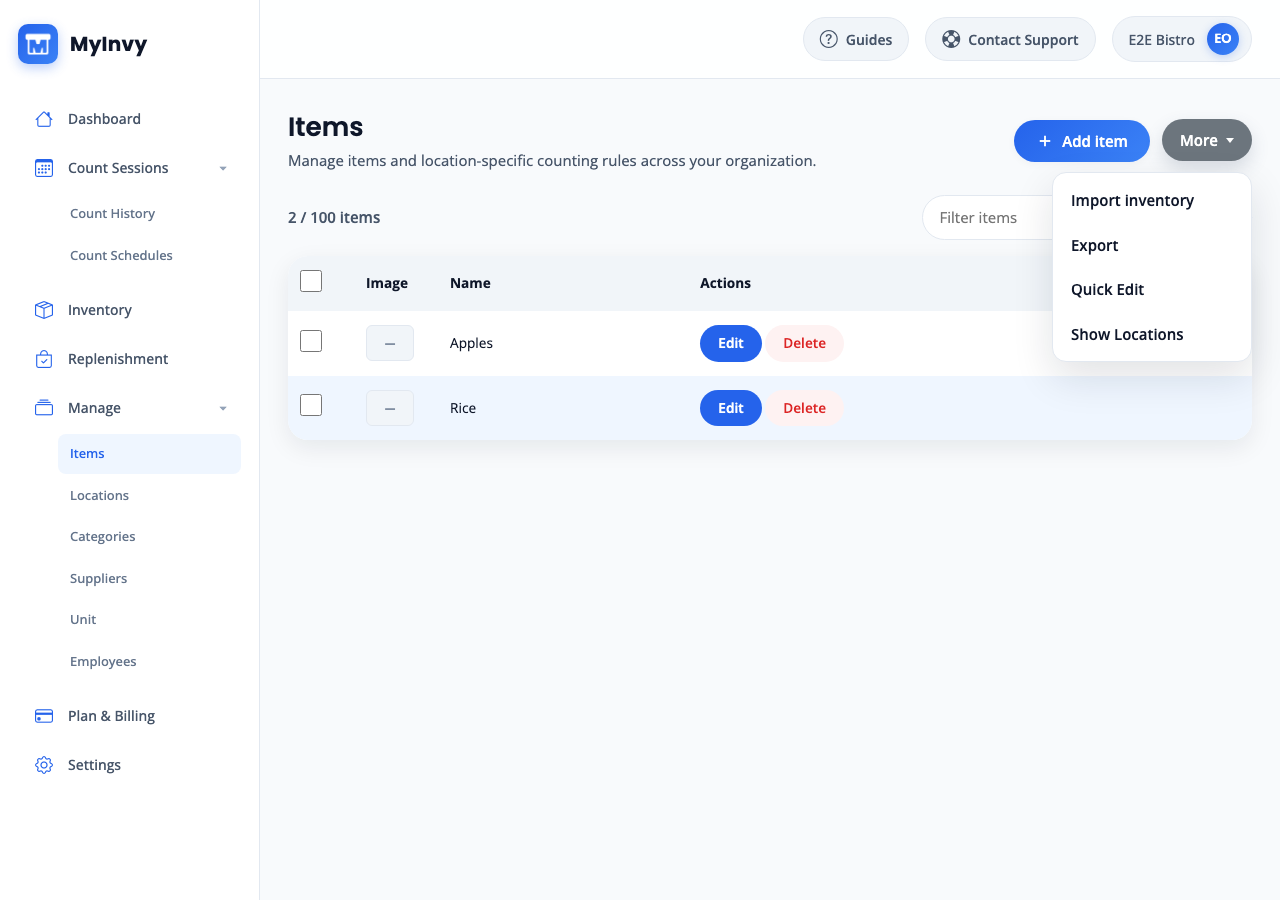
More menu showing Import inventory, Export, Quick Edit, and Show Locations. Add or edit an item
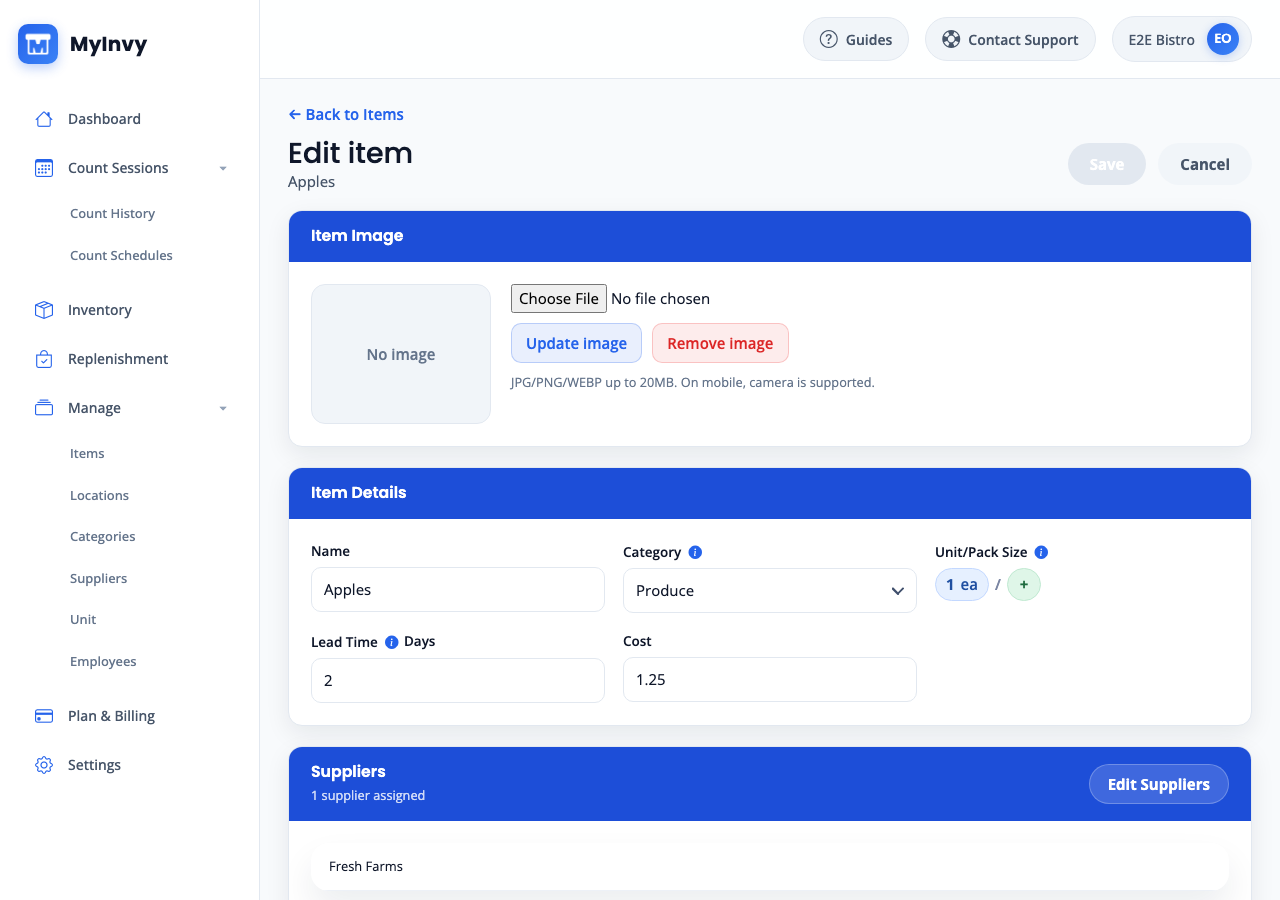
Click Add item or Edit. Input Name, Category, Unit/Pack Size, Lead Time Days, Cost, and supplier assignments through Edit Suppliers. Upload an image after the item has been saved by selecting a file and clicking Update image.
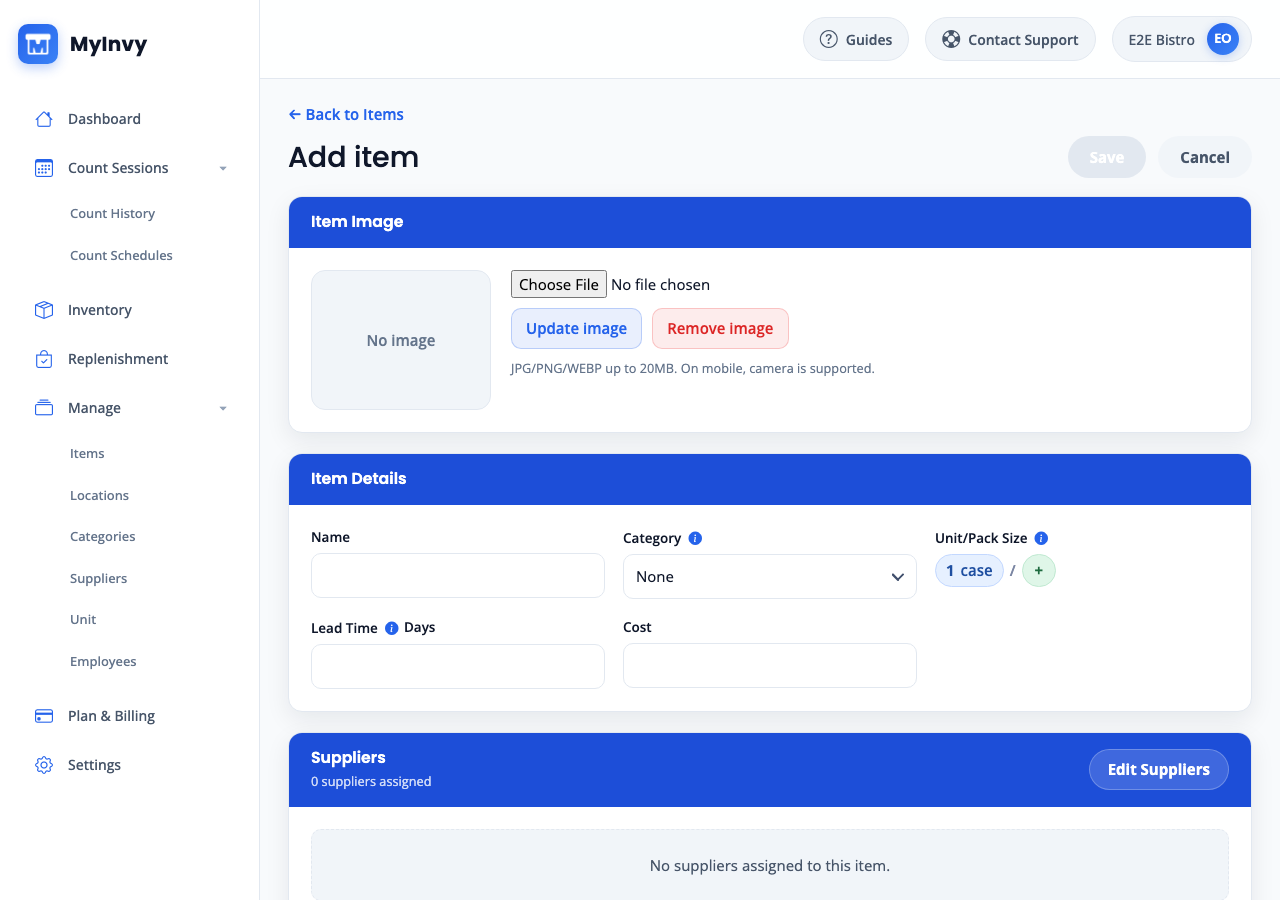
Add item form with Item Image, Item Details, Suppliers, and Save. Configure location rules
In Location Configurations, click Add Location. Select Location, Unit, Count Policy, Reorder Point, and Par Level. Choose a preferred stocking area or add stocking-area placement rows, then click Save.
Location Configurations section with Add Location, Unit, Count Policy, Reorder Point, Par Level, and stocking-area controls. Quick-edit or bulk update rows
Choose More > Quick Edit, change editable table fields, and click Save Changes or Finish Edit. For bulk changes, select multiple rows, click Bulk update, add a location configuration, and click Apply to selected items. Use Bulk delete only when selected items should be deleted or archived.
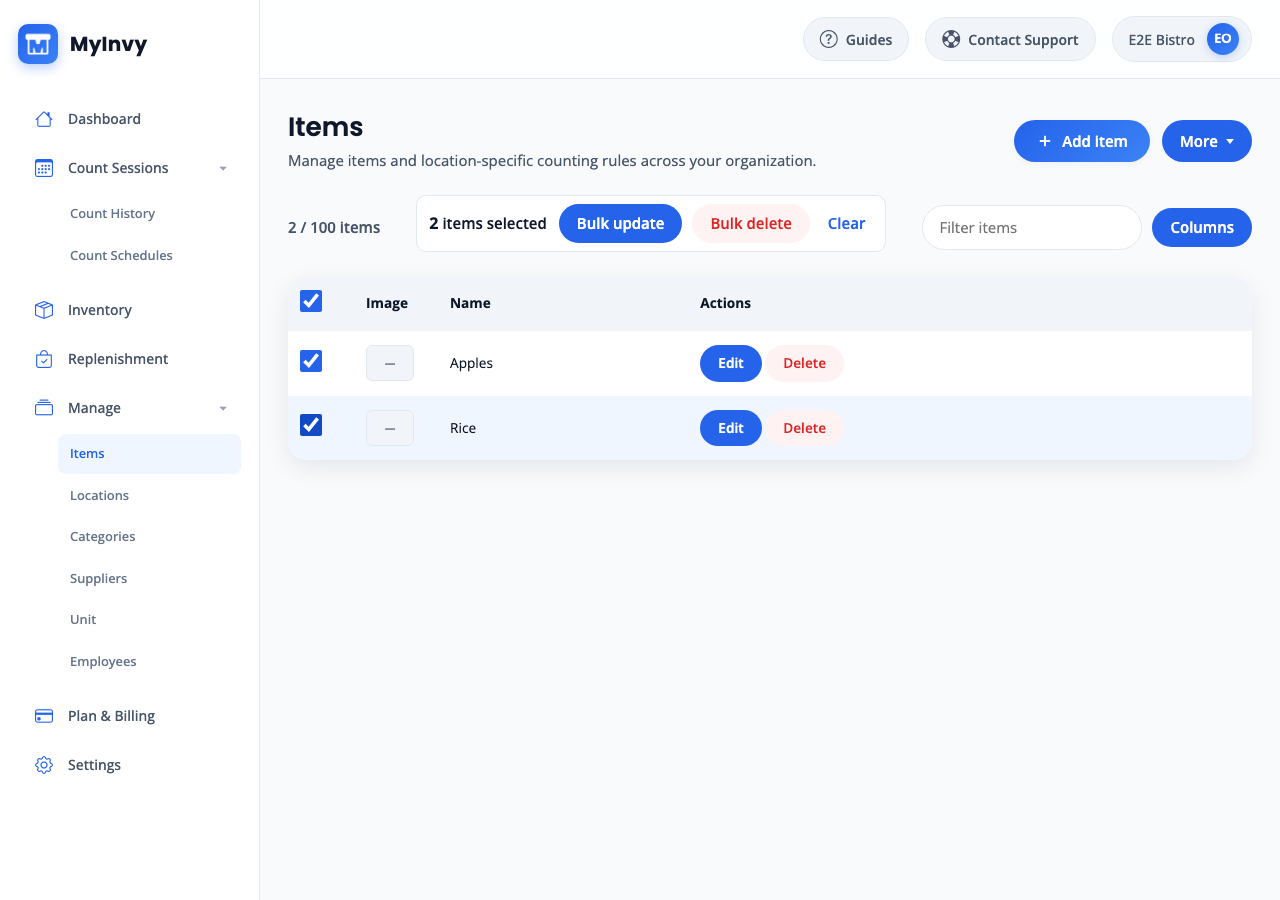
selected items bulk banner with Bulk update, Bulk delete, and Clear. Import inventory from a file
Click More > Import inventory. On Inventory Import, select locations to feature, click Download template, then click Next: Upload file. Upload the 6-tab Excel template or supported CSV/XLSX/XLS/ZIP file, review Recent imports and issue counts, click Next: Edit items, choose Include rows with warnings when appropriate, and click Apply import.
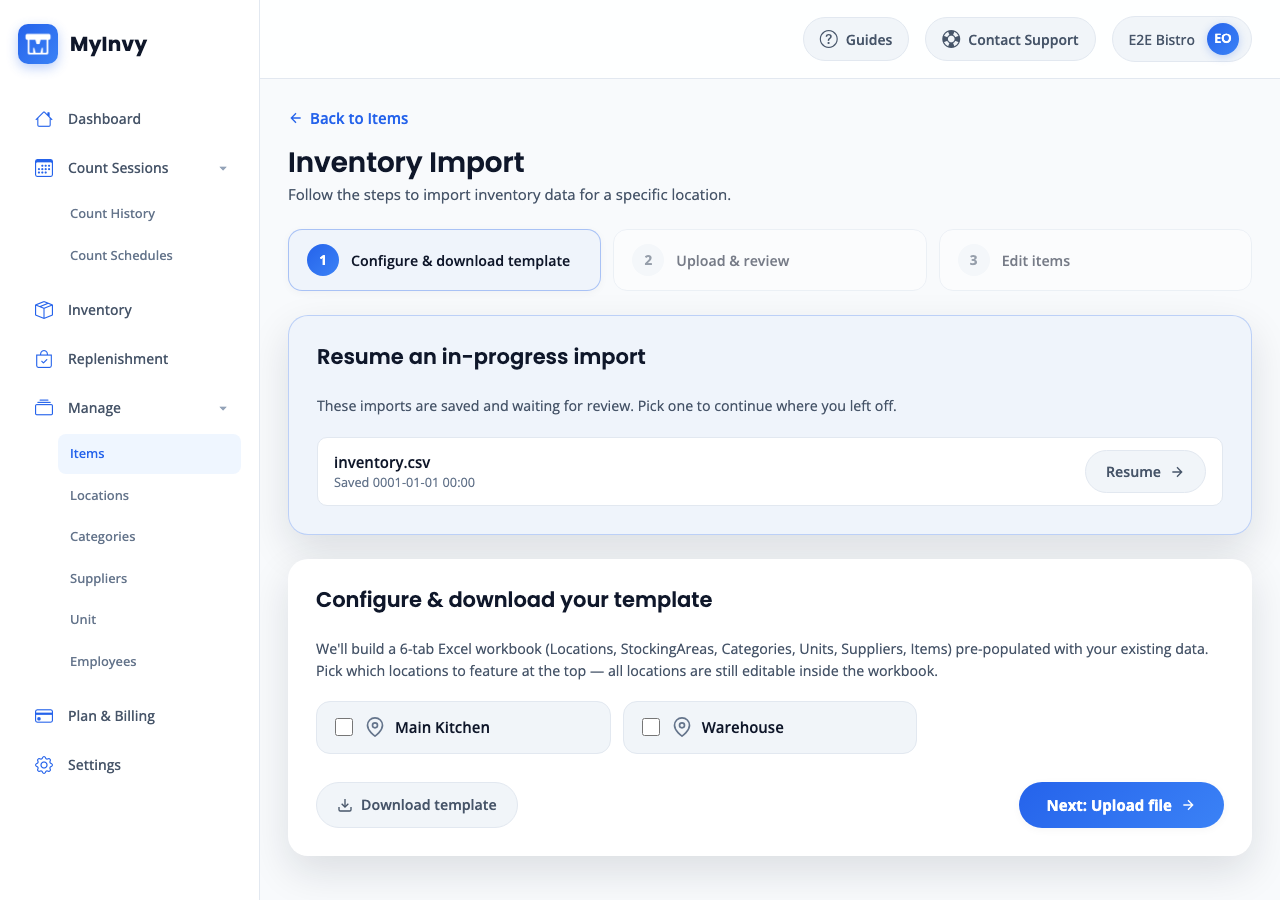
Inventory Import steps for Configure & download template, Upload & review, and Edit items.
Success Criteria
Saved items appear in Items, Inventory, Count Sessions, and Replenishment workflows with the expected category, suppliers, units, location rules, and stocking-area placement.
Troubleshooting Tips
- If Save is disabled, change a field first and confirm every location configuration has both Location and Unit.
- If Each location can only be configured once appears, remove the duplicate location configuration before saving.
- If an import fails, download the issue report, correct rows with errors, and upload again.
- If a file is rejected, confirm it is under 20 MB and uses a supported file type.